
Select All Unique Helms in Path of Exile 2: Dawn of the Hunt — Full Review & Build Analysis
All new Unique helms in Path of Exile 2 Dawn of the hunt
Act 2 of Path of Exile 2 opens up the windswept lands of the Maraketh, and with it, a wealth of hidden content. From secret Rare monster encounters to permanent character upgrades, Act 2 rewards careful exploration with powerful returns: Uncut Skill Gems, valuable Gold and Currency Orbs, gear upgrades, and ascendancy progression items are scattered across its expansive desert and cavernous zones.
This guide breaks down everything you need to know to navigate Act 2: where to go, what to look for, and how to prepare for the key fights — all supplemented with gameplay footage and annotated visual references.
Path of Exile 2 is currently in Early Access (Patch 0.2.0 and beyond), which means the campaign content may receive rapid iteration. Secret zones, encounter placements, and boss mechanics can shift between patches. Bookmark or pin this guide to stay updated with the latest walkthroughs and zone changes.
Act 2’s map system introduces a layer of post-exploration discovery. Hidden encounters often reveal themselves only after you’ve fully cleared or exited the zone. These locations are not always immediately obvious — especially if you’re rushing from objective to objective. But knowing where to look can unlock significant progression advantages.
There are two main types of secrets to track:
Major Encounters (Symbol on Map)
These offer permanent character buffs or key story progression. They’re often guarded by boss-tier monsters or tied to side quest chains.
Minor Encounters (No Symbol)
These can still reward you with Uncut Gems, Gold, or currency items, but won’t be marked as obviously. Some may require triggering a nearby interaction or defeating a mini-boss to open access.
Checkpoints in Path of Exile 2 are not just for convenience. They often hint at nearby hidden encounters or special events. While checkpoints can appear randomly, their presence is a strong indicator to investigate the surrounding environment thoroughly.
Key tips when approaching checkpoints:
Check around unusual rock formations or obscure pathways.
Revisit the location after completing nearby quests or objectives, as some secrets become accessible later.
Pay close attention to any visual anomalies or structures that seem slightly out of place.
This guide uses clear visual references and detailed descriptions to help you quickly locate each secret and ensure you don’t miss any crucial rewards throughout Act 2.
You will start off Act II from Vastiri Outskirts. This area generally introduce the map layout as well as the theme of act 2. Progression are generally straight forward with an interesting boss fight at the end. Overall no secrect to find in this area. As soon as you defeat the boss, you will progress to the main hub of Act II
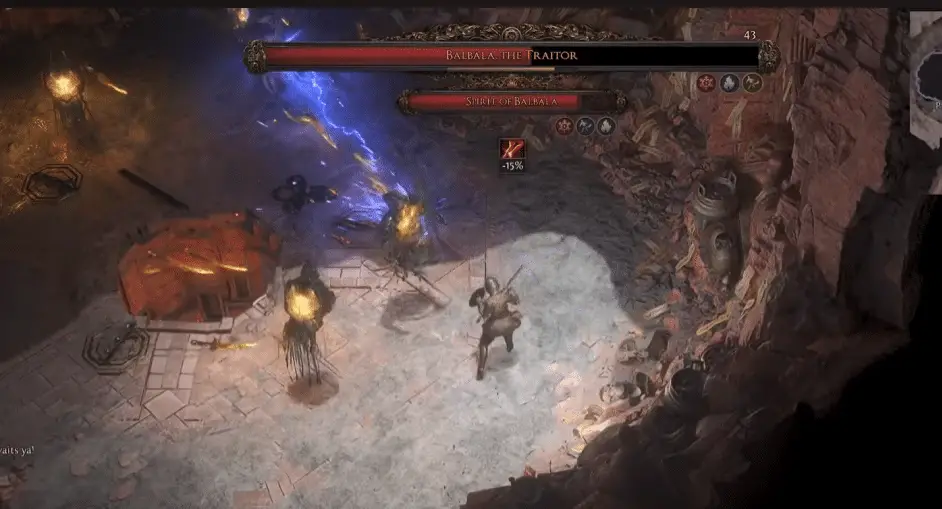
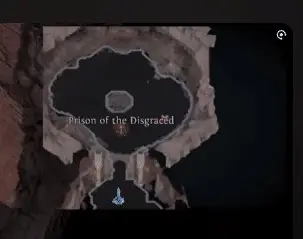
In Traitor’s Passage, you’ll find a significant hidden area known as the Prison of the Disgraced. Entering this location is essential, as it begins your journey toward unlocking the Trial of the Sekhemas, the first crucial step to obtaining your powerful Ascendancy Class.
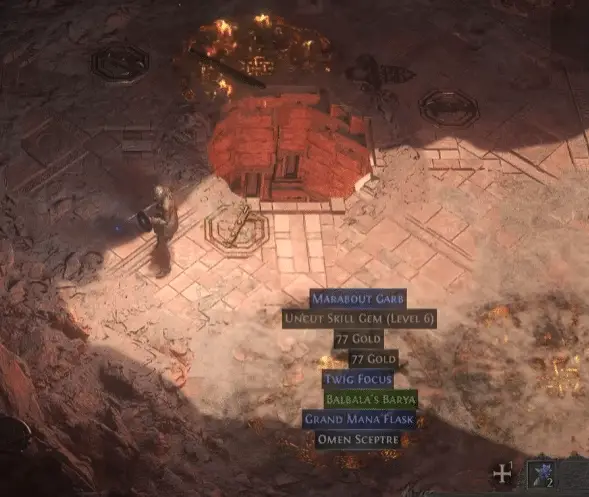
While navigating through the winding corridors of the Traitor’s Passage, you may notice a subtle trail of scattered gold coins leading you toward a Rare Chest near one of the checkpoints. Although intriguing, this minor loot cache typically yields random, modest rewards intended as compensation for players who find themselves slightly off course. It’s not worth diverting too far from your primary path to pursue this chest, so simply collect the loot if you stumble upon it naturally.
Rewards: Small amount of Gold, Randomized Rare loot
Recommendation: Don’t actively seek this chest; consider it a pleasant bonus if encountered naturally.
The hidden Tinker’s Tools event in the Mawdun Quarry zone is specifically tied to your actions in Act 1. This event is essentially a backup mechanic designed for players who did not return the Smithing Tools to Renley earlier. If you have already handed the tools to Renley and unlocked the Salvage Bench, the Tinker’s Tools event will not appear for you. Instead, you might find an empty chest at its location, indicating where the tools would have been.

In the vast, open plains of the Mastodon Badlands, adventurers will encounter the enormous skeletal remains of a forgotten, colossal creature. The locals have transformed this haunting landmark into the Shrine of Bones, a sacred spot central to their dark, necromantic rituals.
The Shrine of Bones is notable for its guaranteed drop of valuable Uncut Gems:
Normal Difficulty: Level 1 Uncut Support Gem
Cruel Difficulty: Level 13 Uncut Skill Gem
Exploring this shrine is highly recommended, as Uncut Gems are crucial in shaping powerful character builds.
The Mastodon Badlands also feature scattered ritualistic summoning sites, where local zealots invoke Carrion Reapers. While these rituals don’t offer additional loot, they enrich the atmosphere and provide engaging combat encounters.

Exploring the eerie and hostile Bone Pits area will lead you into conflict with numerous enemies, among which the important quest item—the Sun Clan Relic—can drop. The relic typically appears randomly as loot from monsters encountered while progressing through the area.
Additionally, your journey through the Bone Pits culminates in a key story encounter against a formidable unique boss named Ekbab, Ancient Steed. Defeating Ekbab and the surrounding enemies typically guarantees acquiring the Sun Clan Relic, a vital component you’ll need later during your quest progression in the Valley of the Titans.

Objective: Defeat Ekbab, Ancient Steed, collect the Sun Clan Relic
Importance: Mandatory story progression item
Keth is one of the most intriguing zones in Path of Exile 2 Act 2, boasting multiple secrets worth uncovering. As you battle your way through this ancient area, keep an eye out for the Kabala Clan Relic, the second half of a relic whose counterpart you previously collected in the Bone Pits. Slay enemies throughout Keth to locate this crucial item.

Hidden beneath the sands within a marked pit near a checkpoint lurks Kabala, Constrictor Queen. This unique boss encounter is easily overlooked due to its subterranean location, but defeating Kabala yields an invaluable reward: the Book of Specialisation, granting you an additional +2 Passive Skill Points and +2 Weapon Swap Passives. This encounter is critical for character progression—make sure you don’t miss it!

Rewards: Book of Specialisation (+2 Passive Skill Points, +2 Weapon Swap Passives), Kabala Clan Relic (from random monster drop)
Recommendation: Prioritize locating and defeating Kabala; the skill points are highly valuable early in the game.
Within Keth lies a hidden Abandoned Shrine, accessible through an intact building’s door amidst ruins. While initially appearing empty, exploring further triggers an ambush by sand-covered monsters guarding a Rare Chest. This chest provides randomized gold, loot, and notably, a guaranteed Magic Amulet in both Normal and Cruel difficulties, making this secret highly rewarding early in your adventure.
Rewards: Guaranteed Magic Amulet, Gold, Randomized Rare Loot
Recommendation: Worth a quick detour; the Magic Amulet can significantly boost your early-game survivability or damage output.
Another mysterious site in Keth, the Looted Vault, lies behind a doorway in a partially buried building. Curiously empty, the Vault invites speculation about undiscovered secrets. Currently, it offers no immediate reward, but its existence hints at potentially hidden mechanics or future updates. Stay vigilant, as future updates may uncover its secrets.

Deep beneath Keth lies The Lost City, a treasure trove teeming with riches and powerful hidden encounters—specifically the Golden Chest and the unique monster, The Ninth Treasure of Keth.
Upon approaching an ornate sarcophagus within a sunken chamber, you’ll trigger an ambush by a swarm of animated Gilded Scarabs. Clearing these enemies grants access to the Golden Chest, containing random valuable loot and, importantly, a guaranteed Uncut Spirit Gem (one-time reward per difficulty).
Rewards: Guaranteed Uncut Spirit Gem, Random Loot
Recommendation: Highly recommended; Uncut Spirit Gems significantly enhance your character’s build potential early on.
In a distinctive hallway, you’ll face a unique Rare monster known as The Ninth Treasure of Keth. This dangerous foe attacks using arcs of red lightning and summons smaller beetles to its aid. Beware when it begins to overload—its subsequent explosion deals heavy damage. Defeating The Ninth Treasure grants a guaranteed Ruby, Emerald, or Sapphire Jewel, incredibly valuable early in your campaign. Jewels can be socketed into your Passive Skill Tree, providing significant boosts to your build.
Rewards: Guaranteed Jewel (Ruby, Emerald, or Sapphire), Random Loot
Recommendation: Essential; Jewels are rare early-game finds, and obtaining one here greatly enhances your passive tree’s effectiveness.
Following your exploration of The Lost City, you’ll venture into the Buried Shrines, home to two noteworthy secret encounters: the Elemental Offering and the ominously titled Guarded Sarcophagus.

The Elemental Offering room contains three shrines dedicated to elemental powers, each offering a guaranteed Elemental Resistance Ring of its type:
Offering of Fire: Ruby Ring (Fire Resistance)
Offering of Lightning: Topaz Ring (Lightning Resistance)
Offering of Ice: Sapphire Ring (Cold Resistance)
For first time player, Topaz Ring is a very safe option to prepare yourself for the Final Boss of Act II
You can only select one offering per difficulty, so choose wisely according to the resistance you most require. Elemental resistances are critical to your survival, especially as you face tougher foes deeper into the campaign.

Rewards: Choice of Elemental Resistance Ring (Ruby, Topaz, Sapphire)
Recommendation: A highly recommended stop; elemental resistances greatly bolster your defenses, significantly easing future battles.


As its name suggests, the Guarded Sarcophagus encounter involves disturbing a suspiciously placed sarcophagus surrounded by rows of dormant terracotta warriors. Predictably, these statues spring to life when the sarcophagus is approached, trapping you in an intense, ambushed fight. Defeating this wave of enemies rewards you handsomely, yielding an Uncut Gem alongside randomized loot in both Normal and Cruel difficulties.
Rewards: Guaranteed Uncut Gem, Random Loot
Recommendation: Ensure you’re prepared with strong area-of-effect skills; the guaranteed Uncut Gem is well worth the challenge.

At the end of Buried Shrine, you will face Azarian.


The Valley of Titans holds one of Act 2’s most powerful hidden secrets, essential for boosting your character’s performance. As you explore this sprawling area, your goal is to activate a series of ancient switches placed around massive stone Titans. Doing this opens a concealed passage to a hidden area known as the Titan Grotto.
Within the Titan Grotto, you’ll find an altar set before a uniquely carved Titan statue. This altar features two distinct sockets shaped specifically to hold the relics you previously discovered:
Sun Clan Relic from the Bone Pits
Kabala Clan Relic from Keth
Inserting these two relics into their respective slots activates the Titan, granting you a choice between two permanent buffs that significantly enhance your character’s capabilities. This choice can be revisited at any point by returning to the Titan Grotto.
Normal Difficulty:
Charm Mastery: 30% increased Charm Charges gained.
Mana Mastery: 15% increased Mana Recovery from Flasks.
Cruel Difficulty:
Charm Mastery: 30% increased Charm Charges gained.
Vitality Mastery: 15% increased Life Recovery from Flasks.
These permanent buffs are immensely valuable, and since you can freely swap between them by revisiting the Titan Grotto, don’t hesitate to experiment with each to find the best match for your build.

These two enemies are also very fast and has very high physical damage – be prepare for a difficulty spike here.
Deshar hides two important secrets integral to strengthening your character and preparing you for tougher challenges ahead.

A few minutes before becoming another Fallen Dekhara
Hidden among the sands and ruins in Deshar lies the corpse of the Fallen Dekhara, which holds a quest item: the Final Letter. Turn this letter into the NPC Shambrin in town, and you’ll be rewarded handsomely with +2 Passive Skill Points and +2 Weapon Swap Skill Points.
Rewards: +2 Passive Skill Points, +2 Weapon Swap Skill Points
Recommendation: High priority; additional passive points dramatically improve your build’s flexibility.
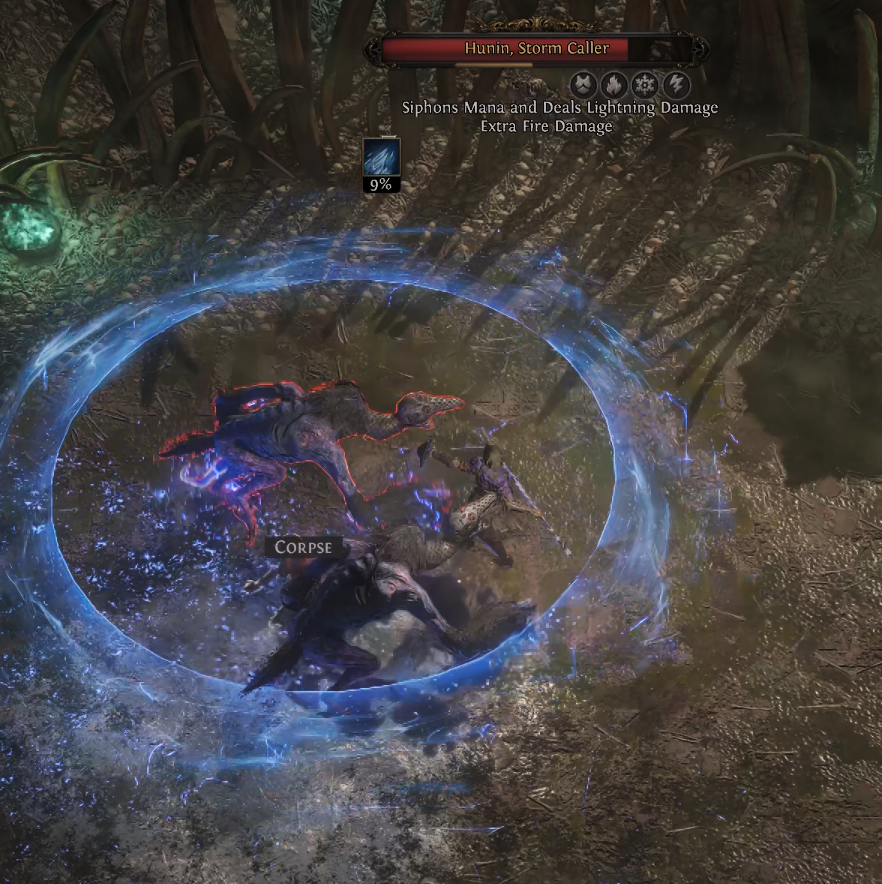
In the heart of Deshar awaits a dangerous challenge known as The Watchful Twins, two powerful Rare Monsters named Hugin and Munin, paying homage to the mythical ravens serving the Norse god Odin. Their bone-laden arena is both ominous and treacherous, marking the battleground clearly.
These two enemies are considered “Rare” meaning they are spawned with random affix. This could ranging from easily manageable to stupidly difficult and cheap. In the above screenshot – this will make Ruthless Character runaway without thinking about the drops
The twins guard a valuable Djinn Barya—a special key used to open an instance of the Trial of the Sekhemas. Unlike the quest version obtained earlier in the act, this version is tradeable and can be farmed repeatedly to collect powerful Relics and loot, preparing you thoroughly for future Trials of Ascendancy. However, it does not grant additional Ascendancy passive points if you’ve already completed the trial through the main questline.
Rewards: Djinn Barya (Tradable Trial Key), High-value loot
Recommendation: Excellent farming spot; challenging but highly rewarding, especially beneficial for future Trial runs.
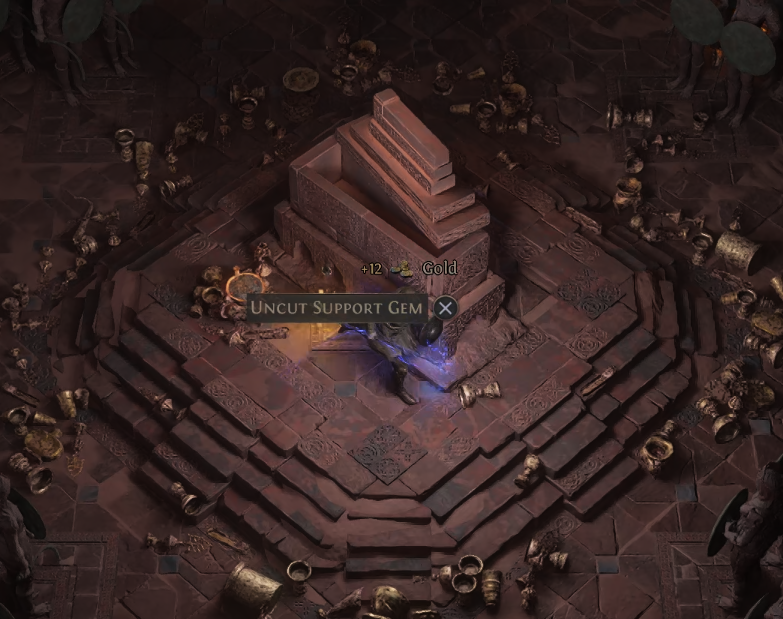
Connecting Deshar with the Spires of Deshar, the Path of Mourning primarily serves as a transitional area but holds a notable hidden event named Shifting Vases.
Inside a seemingly ordinary storage room are innocuous-looking vases, concealing valuable treasures. However, once you attempt to claim the loot, these vases spring to life, launching a surprise ambush. Fortunately, despite their animated hostility, these monsters are relatively easy foes to defeat.
Rewards:
Normal Difficulty: Uncut Support Gem (Essential for strengthening skills with added effects)
Cruel Difficulty: Uncut Skill Gem (Crucial for acquiring and enhancing core skills)
The Shifting Vases encounter is straightforward and low-risk, yet highly rewarding. Make sure you don’t miss this quick and easy treasure during your passage through the area.
Hidden within the Spires of Deshar is an essential and powerful secret: The Sisters of Garukhan Shrine. Interacting with this shrine grants a significant permanent defensive enhancement:
Permanent Buff: +10% Lightning Resistance.
This permanent bonus can be claimed in both Normal and Cruel difficulty, allowing you to accumulate a total of +20% Lightning Resistance across your character progression.
However, claiming this power comes at a price. Immediately after receiving the buff, previously inert statues throughout the Spires of Deshar awaken, becoming hostile and attacking on sight. Ensure you are prepared for sudden combat once you accept this boon.
Rewards: +10% Lightning Resistance per difficulty (total +20% Lightning Resistance).
Recommendation: Highly recommended to strengthen defenses—just be prepared for combat immediately afterward.
Act 2 of Path of Exile 2 is abundant with hidden treasures, secret encounters, and powerful permanent enhancements crucial for character progression. As you explore the campaign, keep these highlights in mind to ensure you don’t miss out on major benefits:
Ascendancy Class Unlock:
Defeat the hidden boss encounter within the Traitor’s Passage to gain access to the essential Trial of the Sekhemas.
Uncut Skill & Support Gems:
Obtain powerful gems to enhance your build from:
Shrine of Bones in Mastodon Badlands.
Golden Chest in the Lost City.
Guarded Sarcophagus in Buried Shrines.
Permanent Character Buff (Relics):
Collect the Sun Clan Relic (Bone Pits) and Kabala Clan Relic (Keth), then bring them to the Valley of the Titans for a valuable, changeable permanent character buff.
Passive Skill Points:
Earn valuable passive points:
Defeat Kabala, Constrictor Queen in Keth (+2 Passive Skill Points).
Complete the Final Letter quest in Deshar (+2 Passive Skill Points).
Guaranteed Jewel for Passive Tree:
Defeat The Ninth Treasure of Keth (Gilded Beetle) in the Lost City to obtain a guaranteed Jewel—an essential early-game boost.
Elemental Resistance Rings:
Visit the Elemental Offering in the Buried Shrines, choosing from Ruby, Topaz, or Sapphire rings to bolster essential resistances.
Lightning Resistance:
Interact with the Sisters of Garukhan Shrine in the Spires of Deshar for a cumulative +20% Lightning Resistance across Normal and Cruel difficulties.
Following these tips ensures maximum character optimization during your Path of Exile 2 Act 2 exploration, empowering your build significantly for future challenges.


